爬虫相关
requests.post() 是使用 Python 中的 requests 库发起 HTTP POST 请求的方法。下面是该方法的一些常见参数:
requests.post(url, data=None, json=None, headers=None, files=None, params=None, auth=None, cookies=None, timeout=None, proxies=None, verify=None)
-
url (str): 请求的 URL 地址。
-
data (dict or bytes or file-like object, optional): 请求的数据。可以是字典、字节流或类文件对象。如果是字典,它会被编码为表单数据。如果是字节流或文件对象,它会被直接发送。多传入参数本身不会对请求造成直接的负面影响
-
json (json-serializable object, optional): 将 Python 对象序列化为 JSON 格式,并将其作为请求的主体发送。
-
headers (dict, optional): 请求头信息,以字典形式提供。
-
files (dict, optional): 上传文件时使用,指定要上传的文件。字典的键是字段名,值是文件的元组,包含文件名和文件对象。
-
params (dict, optional): URL 查询参数,以字典形式提供。
-
auth (tuple, optional): HTTP 认证信息,以元组形式提供 (username, password)。
-
cookies (dict, optional): 请求中的 cookie,以字典形式提供。
-
timeout (float or tuple or False, optional): 请求的超时时间,可以是一个浮点数,也可以是一个包含两个元素的元组 (连接超时时间, 读取超时时间)。
-
proxies (dict, optional): 代理设置,以字典形式提供。
-
verify (bool or str, optional): 控制 SSL 证书验证。可以是布尔值,也可以是证书路径。
这些参数提供了很多灵活性,可以根据具体的需求来配置 HTTP POST 请求。在实际使用中,你可能只需要其中的一部分参数,具体的选择取决于你的请求的特定要求。
requests.get() 方法是用于发送 HTTP GET 请求的 requests 库的函数。以下是一些常见的参数和相关属性的详细介绍:
请求参数:
-
url(str): 请求的目标 URL。 -
params(dict or None): URL 参数,用于在 URL 中传递键值对数据。例如,params={"key1": "value1", "key2": "value2"}。 -
headers(dict or None): 请求头信息,用于设置 HTTP 头。例如,headers={"User-Agent": "my-app"}。 -
cookies(dict or None): 要在请求中发送的 cookie 数据。例如,cookies={"session": "token"}。 -
auth(tuple or None): HTTP 认证信息,可以是元组(username, password)。例如,auth=("username", "password")。 -
timeout(float or tuple or None): 请求超时时间,可以是一个浮点数或一个元组。如果是元组,则分别表示连接和读取的超时时间。例如,timeout=5或timeout=(3, 7)。 -
allow_redirects(bool): 是否允许重定向,默认为True。 -
proxies(dict or None): 代理设置,可以为字典,指定协议和代理地址。例如,proxies={"http": "http://proxy.example.com", "https": "https://proxy.example.com"}。 -
verify(bool or str): 是否验证 SSL 证书,如果为True,将验证证书;如果为字符串,则为证书路径。默认为True。
返回对象的属性和方法:
-
response.status_code(int): 响应的 HTTP 状态码。 -
response.headers(dict): 响应头信息。 -
response.text(str): 响应的文本内容,如果响应内容是文本类型。 -
response.content(bytes): 响应的二进制内容。 -
response.json()(method): 将响应内容解析为 JSON 格式。如果响应的内容是 JSON 数据,可以使用这个方法获取解析后的数据。 -
response.raise_for_status()(method): 如果响应状态码不是 200,会抛出HTTPError异常。用于检查请求是否成功。 -
response.url(str): 请求的最终 URL,考虑了可能的重定向。 -
response.cookies(CookieJar): 响应中的 cookies。 -
response.elapsed(Timedelta): 请求响应的时间。
以上是一些常见的参数和返回对象的属性和方法。在实际使用中,根据具体的需求选择合适的参数,检查返回对象的属性和方法以获取相应的信息。
import datetime
import os
import re
import time
import requests
from PIL import Image
from docx import Document
from docx.enum.text import WD_PARAGRAPH_ALIGNMENT
from docx.shared import Inches
from lxml import etree
import send_short_messages


class AiQ(object):
    def __init__(self):
        # 个人主页:需要登录才能访问的页面
        self.url = 'https://www.iqshw.com/'
        # 登录成功后抓取的
        # headers:cookie referer user-Agent
        self.headers = {
            'User-Agent': 'Mozilla/5.0 (Windows NT 10.0; Win64; x64) AppleWebKit/537.36 (KHTML, like Gecko) Chrome/73.0.3683.75 Safari/537.36',
        }
        self.document = Document()
        self.path = "./"
        # 插入一级标题
        i = datetime.datetime.now()
        year_month_day = ("%s年%02d月%02d日" % (i.year, i.month, i.day))
        times = ("%02d时%02d分%02d秒" % (i.hour, i.minute, i.second))  # 小时前有个空格为了send_email查找前两个字符转int型方便
        self.document.add_heading(year_month_day + '更新内容',
                                  level=0).paragraph_format.alignment = WD_PARAGRAPH_ALIGNMENT.CENTER  # 插入标题 .居中
        self.document.add_paragraph("--更新于" + times, "Title").alignment = WD_PARAGRAPH_ALIGNMENT.RIGHT

    def fist_html(self):
        html = requests.get(url=self.url, headers=self.headers).content.decode('GBK')

        parse_html = etree.HTML(html)
        r_list = parse_html.xpath(
            '//div[@class="new_up iq_shadown clearfix"]/div/ul/li/a/text()'
            '|//div[@class="new_up iq_shadown clearfix"]/div/ul/li/a/font/text()')

        new_date = parse_html.xpath('//div[@class="new_up iq_shadown clearfix"]/div/ul/li/span[@class="red"]/text()')
        html = parse_html.xpath('//div[@class="new_up iq_shadown clearfix"]/div/ul/li/a[@target="_blank"]//@href')
        new_content_len = len(new_date)
        title = r_list[:new_content_len]  # 取时间一样长度的标题新闻
        half_html = html[:new_content_len]  # 取时间一样长度的网址
        print("长度为", new_content_len)
        lis = list(zip(title, half_html))   # 两个列表合成一个
        print(lis)
        for i in lis:
            print(i)
            final_title = title[0]
            secord_url = 'https://www.iqshw.com' + half_html[1]
            print("标题为:", final_title)
            print("网址为:", secord_url)
            satisfy_title = re.compile('天翼|服务器|话费|域名|电费', re.S).findall(final_title)
            if satisfy_title:
                print("满足关注的活动")
                if len(final_title) > 30:
                    final_title = final_title[:30]
                send_short_messages.short_message("18937028075", final_title)

            self.document.add_heading(str(lis.index(i) + 1) + "." + final_title, level=1)
            try:
                self.secord_html(secord_url)
            except Exception as result:
                print("失败图片", result)
            pass

    def secord_html(self, secord_url):
        html = requests.get(url=secord_url, headers=self.headers).content.decode('GBK')
        parse_html = etree.HTML(html)
        r_list = parse_html.xpath(
            '//div[@class="content-intro typo"]/p//text()|//div[@class="content-intro typo"]/p/img/@src')
        print(r_list)

        for pic in r_list:
            # print(r_list[i])
            pic_link = re.compile('(http.*?.jpg)', re.S).findall(pic)
            if pic_link:
                # print(pic_link[0])
                data = requests.get(pic_link[0]).content
                # name = pic_link[0][-10:]

                pic_name = "%s%s" % (self.path, "1.jpg")
                plc_pic_name = "%s%s" % (self.path, "1.png")
                print("正在下载%s...%s" % (pic_name, pic_link[0]))
                with open(pic_name, "wb") as f:
                    f.write(data)
                im = Image.open(pic_name)
                im.save(plc_pic_name)

                self.document.add_picture(plc_pic_name, width=Inches(4))

            else:
                self.document.add_paragraph(pic)

    def delet_pic(self):
        os.remove(self.path + '1.jpg')
        os.remove(self.path + '1.png')

    def main(self):

        self.fist_html()
        self.delet_pic()
        self.document.save(self.path + "今日完整更新内容.docx")


if __name__ == '__main__':
    run = AiQ()
    run.main()
    # print("3秒后关闭cmd")
    # time.sleep(3)
    # os.system('%s%s' % ("taskkill /F /IM ", " cmd.exe"))  # 关闭cmd
useragent
# 适合百度
ua_list = [
'Mozilla/5.0 (Macintosh; Intel Mac OS X 10_13_5) AppleWebKit/537.36 (KHTML, like Gecko)',
'Mozilla/5.0 (X11; Linux x86_64) AppleWebKit/537.36 (KHTML, like Gecko)',
'Mozilla/5.0 (X11; Linux x86_64) AppleWebKit/537.36 (KHTML, like Gecko)',
'Mozilla/5.0 (X11; U; Linux x86_64; zh-CN; rv:1.9.2.10) Gecko/20100922 '
]

# 适合其他网站
ua_list2 = [
            "Mozilla/5.0 (Windows NT 6.1; Win64; x64) AppleWebKit/537.36 (KHTML, like Gecko) Chrome/73.0.3683.75 Safari/537.36",
            "Mozilla/5.0 (X11; Linux x86_64) AppleWebKit/537.36 (KHTML, like Gecko) Chrome/74.0.3729.131 Safari/537.36",
            "Mozilla/5.0 (Macintosh; U; Intel Mac OS X 10_6_8; en-us) AppleWebKit/534.50 (KHTML, like Gecko) Version/5.1 Safari/534.50",
            "Mozilla/5.0 (Windows NT 6.1; Win64; x64; rv:65.0) Gecko/20100101 Firefox/65.0",
            "Mozilla/5.0 (X11; Linux x86_64; rv:60.0) Gecko/20100101 Firefox/60.0",
            "Mozilla/5.0 (X11; U; Linux x86_64; zh-CN; rv:1.9.2.10) Gecko/20100922 Ubuntu/10.10 (maverick) Firefox/3.6.10",
            "Mozilla/5.0 (Windows NT 6.1; WOW64) AppleWebKit/537.36 (KHTML, like Gecko) Chrome/58.0.3029.110 Safari/537.36 SE 2.X MetaSr 1.0",
            "Mozilla/5.0 (Windows NT 6.1; WOW64) AppleWebKit/537.36 (KHTML, like Gecko) Chrome/63.0.3239.132 Safari/537.36 QIHU 360SE",
            "Mozilla/5.0 (Windows NT 6.1; Win64; x64; Trident/7.0; .NET CLR 2.0.50727; SLCC2; .NET CLR 3.5.30729; .NET CLR 3.0.30729; .NET4.0C; .NET4.0E; rv:11.0) like Gecko",
            "Mozilla/5.0 (Windows NT 6.1; Win64; x64) AppleWebKit/537.36 (KHTML, like Gecko) Chrome/73.0.3683.103 Safari/537.36 OPR/60.0.3255.84",
            "Mozilla/5.0 (X11; Linux x86_64) AppleWebKit/537.36 (KHTML, like Gecko) Chrome/73.0.3683.103 Safari/537.36 OPR/60.0.3255.83",
            "Opera/9.80 (Macintosh; Intel Mac OS X 10.6.8; U; en) Presto/2.8.131 Version/11.11",
            "Mozilla/5.0 (Windows NT 6.1; WOW64) AppleWebKit/534.57.2 (KHTML, like Gecko) Version/5.1.7 Safari/534.57.2",
            "Mozilla/5.0 (Windows NT 6.1; WOW64) AppleWebKit/537.36 (KHTML, like Gecko) Chrome/55.0.2883.87 UBrowser/6.2.4098.3 Safari/537.36",
            "Mozilla/5.0 (Windows NT 6.1; WOW64) AppleWebKit/537.36 (KHTML, like Gecko) Chrome/57.0.2987.98 Safari/537.36 LBBROWSER",
            "Mozilla/5.0 (Windows NT 6.1; WOW64) AppleWebKit/537.36 (KHTML, like Gecko) Chrome/70.0.3538.25 Safari/537.36 Core/1.70.3676.400 QQBrowser/10.4.3473.400",
            "Mozilla/5.0 (Windows NT 6.1; WOW64) AppleWebKit/537.36 (KHTML, like Gecko) Chrome/61.0.3163.79 Safari/537.36 Maxthon/5.2.7.2500",
            "Mozilla/5.0 (Macintosh; Intel Mac OS X 10_9_2) AppleWebKit/537.36 (KHTML, like Gecko) Chrome/34.0.1847.131 Safari/537.36",
            "Mozilla/5.0 (Windows NT 6.1; WOW64) AppleWebKit/537.36 (KHTML, like Gecko) Chrome/47.0.2526.106 BIDUBrowser/8.7 Safari/537.36",
            "Mozilla/5.0 (Windows NT 6.1; WOW64) AppleWebKit/537.36 (KHTML, like Gecko) Chrome/69.0.3497.100 Safari/537.36 QIHU 360EE",
            "Mozilla/5.0 (Windows NT 10.0; Win64; x64) AppleWebKit/537.36 (KHTML, like Gecko) Chrome/59.0.3071.115 Safari/537.36"
        ]
一、实例化seesion,使用seesion发送post请求,在使用他获取登陆后的页面
import requests
session = requests.session()
post_url="http://www.renren.com/plogin.do";
post_data={"email":"2290187229@qq.com","password":"yhnujm2490@"}
headers={"User-Agent":"Mozilla/5.0 (Linux; Android 6.0; Nexus 5 Build/MRA58N) AppleWebKit/537.36 (KHTML, like Gecko) Chrome/73.0.3683.75 Mobile Safari/537.36"}
#使用session发送post请求,cookie保存在其中
session.post(post_url,data=post_data,headers=headers)
#在使用session进行请求登陆之后才能访问的地址
r = session.get("http://www.renren.com/970256283",headers=headers)
#保存页面
with open("renren1.html","w",encoding="utf-8") as f :
    f.write(r.content.decode())
二、header中添加cookies健,值为cookies字符串
三、在请求方法中添加cookies参数,接收字典形式的cookie,字典形式的cookie中的键是cookie的name,值是cookie的value
例如
怎么获取<script id="__NEXT_DATA__" type="application/json">
您可以使用Python的requests和lxml库来获取包含JavaScript的HTML页面中的数据。
下面是一个示例代码,可以获取一个页面中ID为__NEXT_DATA__的<script>标签的内容,然后使用json模块将其转换为Python对象:
import requests
from lxml import html
import json

# 发送GET请求
response = requests.get('https://example.com')

# 解析HTML页面
doc = html.fromstring(response.text)

# 获取__NEXT_DATA__脚本标签的内容
script_text = doc.xpath('//script[@id="__NEXT_DATA__"]/text()')[0]

# 将JSON字符串转换为Python对象
data = json.loads(script_text)
此代码将从https://example.com网站中获取__NEXT_DATA__脚本标签的内容,并将其转换为Python对象。如果页面中有多个ID为__NEXT_DATA__的<script>标签,则可以通过使用xpath表达式来更精确地定位所需的标签。
# 设置文件数据
files = {
    "templateFiles": (None, ""),  # 空文件,你可以根据实际情况填写文件路径
    "templateFiles": (None, ""),
    "templateFiles": (None, ""),
}


#如果你有实际的文件需要上传,你应该将文件的路径传递给元组的第二个元素,并将文件名传递给元组的第一个元素。以下是一个示例,假设你有三个文件需要上传(方法不行):

files = {
    "templateFiles1": ("file1.txt", open("file1.txt", "rb")),
    "templateFiles2": ("file2.txt", open("file2.txt", "rb")),
    "templateFiles3": ("file3.txt", open("file3.txt", "rb")),
}


# 上次图片有name为templateFiles的(待检验)
piclist = [r"D:\天翼云盘下载\6dcd4c5b781811b08eebecdbe2c5493.jpg", r"D:\天翼云盘下载\6dcd4c5b781811b08eebecdbe2c5493.jpg",]
files = {}
if len(piclist)== 1:
    file_name = os.path.basename(os.path.abspath(piclist[0]))


    files = {
        "templateFiles": [
            (file_name, open(piclist[0], "rb")),
            ("", (None, "")),
            ("", (None, ""))
        ]
    }

elif len(piclist) == 2:
        file_name1 = os.path.basename(os.path.abspath(piclist[0]))
        file_name2 = os.path.basename(os.path.abspath(piclist[1]))

        files = {
            "templateFiles": [
                (file_name1, open(piclist[0], "rb")),
                (file_name2, open(piclist[1], "rb")),
                ("", (None, ""))
            ]
        }

else:
    print("长度错误")

print("files:", files)
加入files参数
response = requests.post('https://example.com', files=files)
安装chromedriver
下载
chromedriver的版本一定要与Chrome的版本一致,不然就不起作用。
有两个下载地址:
1、http://chromedriver.storage.googleapis.com/index.html
2、https://npm.taobao.org/mirrors/chromedriver/
3.高版本:https://googlechromelabs.github.io/chrome-for-testing/
当然,你首先需要查看你的Chrome版本,在浏览器中输入chrome://version/
import random
import re
import time
import warnings

from selenium import webdriver

import writelog

warnings.filterwarnings("ignore")


class Wps(object):
    def __init__(self):
        # self.dic = {}
        # 打开开发者模式,检测不到selenium
        self.chrome_driver_path = "C:\\Users\\yys53\\OneDrive\\python\\"

        self.chrome_options = webdriver.ChromeOptions()
        self.chrome_options.add_experimental_option('excludeSwitches', ['enable-automation'])
        self.chrome_options.add_experimental_option('w3c', False)  # 关闭w3c模式出坑
        self.driver = webdriver.Chrome(self.chrome_driver_path + "chromedriver.exe", chrome_options=self.chrome_options)
        self.driver.maximize_window()
        self.driver.get("https://account.wps.cn/?cb=https%3A%2F%2Fzt.wps.cn%2Fspa%2F2019%2Fvip_mobile_sign_v2%2F%23%2F")
        self.driver.implicitly_wait(10)

    def end_script(self):
        writelog.write_file("wps结束")
        self.driver.quit()

    def login(self):
        print("登录")
        self.driver.find_element_by_xpath('//*[@id="mainWrap"]//span[@class="tpItem_b"]').click()
        time.sleep(random.randint(1, 10) / 5)
        self.driver.find_element_by_xpath('//*[@id="dialog"]//div[@class="dialog-footer-ok"]').click()
        time.sleep(random.randint(1, 10) / 5)
        self.driver.find_element_by_id('email').send_keys(wps账号)  # wps账号
        time.sleep(random.randint(1, 10) / 5)
        self.driver.find_element_by_id('password').send_keys(wps密码)  # wps密码
        time.sleep(random.randint(1, 10) / 5)
        self.driver.find_element_by_id('Shape3').click()

        while True:
            time.sleep(random.randint(1, 10) / 5)
            text = self.driver.find_element_by_xpath('//*[@id="SM_TXT_1"]').text
            if text == "验证成功":
                print("恭喜验证成功")
                time.sleep(random.randint(1, 10) / 5)
                self.driver.find_element_by_id('login').click()
                self.ready_signal()  # 准备签到
                break

    def ready_signal(self):
        print("准备签到")
        for i in range(50):
            time.sleep(random.randint(1, 10) / 5)
            try:
                html = self.driver.page_source
                word = re.compile("会员明日", re.S).findall(html)
                if word:
                    print("已经签到")
                    writelog.write_file("wps签到已完成")
                    text = self.driver.find_element_by_xpath('//*[@id="app"]/div/div[1]/div/div[1]/div[1]/span[2]').text
                    print("总共%s积分" % text)
                    return

                verify_tips = re.compile('签到成功', re.S).findall(html)
                if verify_tips:
                    print("签到成功")
                    writelog.write_file("wps签到已完成")
                    return
                qian = re.compile('class="sec3-btn">签到</div>', re.S).findall(html)
                if qian:
                    print("找到签到,说明没签到,准备签到")
                    click = self.driver.find_element_by_xpath('//div[@class="sec3-btn"]').text
                    print(click)
                    self.driver.find_element_by_xpath('//div[@class="sec3-btn"]').click()
                    time.sleep(random.randint(1, 10) / 5)
                    html_2 = self.driver.page_source
                    verify_tips = re.compile('class="win" style="">', re.S).findall(html_2)
                    # print(verify_tips)

                    if verify_tips:
                        print(verify_tips)
                        element = self.driver.find_element_by_xpath(
                            '//*[@id="app"]//a[@class="sign_btn__big win-btn__sure"]')
                        pic = self.driver.find_element_by_xpath('//*[@id="signVerityImg"]/img')
                        location = element.location
                        print(location)
                        x = location["x"] + 101
                        y = location["y"] + 25
                        word_x = x - 141
                        word_y = y - 116
                        for j in range(80):
                            k = random.randint(0, 4)
                            time.sleep(random.uniform(0.4, 0.6))
                            pic.click()
                            time.sleep(random.uniform(0.4, 0.6))
                            element.click()
                            # print("图片坐标", pic.location)

                            # js = "var q=document.elementFromPoint(%s, %s).click();" % (word_x + k * 64, word_y)
                            # print(js)
                            # self.driver.execute_script(js)
                            #
                            # time.sleep(random.uniform(0.4, 0.6))
                            # # element.click()

                            # self.driver.save_screenshot("G:\\22.png")
                            # print(x, y)
                            # # 坐标为(956, 592)
                            #
                            # js2 = "var q=document.elementFromPoint(%s, %s).click();" % (x, y)
                            # print(js2)
                            # self.driver.execute_script(js2)

                            html_2 = self.driver.page_source
                            verify_tips = re.compile('签到成功', re.S).findall(html_2)
                            if verify_tips:
                                print("签到成功")
                                writelog.write_file("wps签到已完成")
                                return
                        return

                    # self.driver.refresh()
            except Exception as result:
                print(result)


def main():
    run = Wps()
    run.login()
    time.sleep(3)
    run.driver.quit()


if __name__ == '__main__':
    main()
设置cookies
在浏览器可以看到这个网站所有cookie,相等时候就通过了
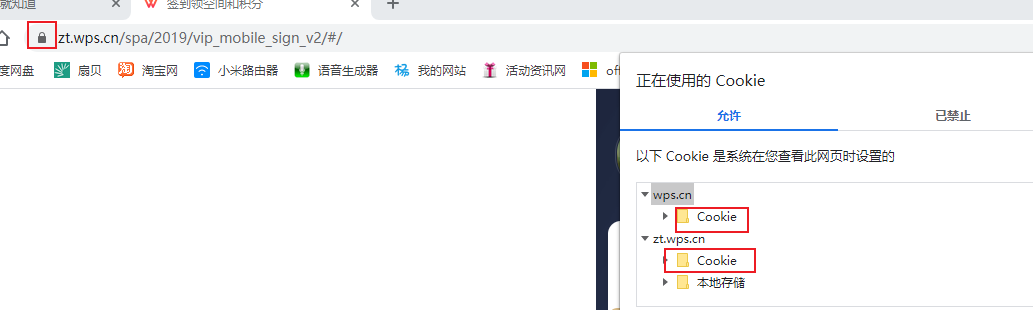

必须先打开一个网站,不然报错,selenium打开浏览器默认没网站的
self.driver.get("https://zt.wps.cn")
self.driver.add_cookie(cookie_dict={'name': 'csrf', 'value': 'E2rRdwprHqIDMfF4NsIdMOZoSfXY35pa','domain': '.wps.cn'})
self.driver.add_cookie(cookie_dict={'name': 'wps_sid', 'value': 'V02SRYFla9Tqvv3Z_gzSMHd8VmxOy3g00a0cd230003721b57f','domain': '.wps.cn'})
self.driver.add_cookie(cookie_dict={'name': 'Hm_lvt_6bb63e416c91510a666853fe6e7935df', 'value': '1608629217','domain': '.wps.cn'})
self.driver.add_cookie(cookie_dict={'name': 'CNZZDATA1261599741', 'value': '780477162-1608625139-%7C1608625139','domain': 'zt.wps.cn'})
self.driver.add_cookie(cookie_dict={'name': 'UM_distinctid', 'value': '17689b0ed8b888-0ac5ad56cf066c-c791039-1fa400-17689b0ed8ca80', 'domain': 'zt.wps.cn'})
self.driver.get("https://zt.wps.cn/spa/2019/vip_mobile_sign_v2/#/")
经过测试只需要一个cookie就可以在线了
self.driver.add_cookie(cookie_dict={'name': 'wps_sid', 'value': 'V02SRYFla9Tqvv3Z_gzSMHd8VmxOy3g00a0cd230003721b57f','domain': '.wps.cn'})
2.1.1 selenium:报错 ‘dict‘ object has no attribute ‘click‘ 解决方法
-
方法1:selenium4的问题,降级到selenium3就没问题了。pip install selenium==3.141.0
- 方法2:pip install appium-python-client==1.3.0也可以规避这个问题
2.1.2 The process started from chrome location /usr/bin/google-chrome is no longer running, so ChromeDriver is assuming that Chrome has crashed
解决办法
option.add_argument('--no-sandbox')
option.add_argument('--disable-dev-shm-usage')
option.add_argument('--disable-extensions')
#option.add_argument('--headless')
1、弹窗
selenium提供 switch_to_alert方法:捕获弹出对话框(可以定位alert、confirm、prompt对话框)
操作方法:
|
switch_to.alert()(老写法:switch_to_alert()) |
通过 switch_to.alert 切换到 alert |
|
accept() |
确认 |
|
dismiss |
取消 |
|
send_keys() |
有输入框才能使用,否则报错 |
|
authenticate(username,password) |
验证,针对需要身份验证的 alert ,目前还没有特别合适的实例 |
|
text |
获取 alert 文本内容,对有信息显示的 alert 框 |
import time
from selenium import webdriver

"""
处理alert弹窗
"""
driver = webdriver.Chrome('F:\PyCharmProject\TestFramework\drivers\chromedriver.exe')
driver.get('file:///C:/Users/Uker/Desktop/seleniumHTML/alert.html')
time.sleep(1)
# 获取alert对话框的按钮,点击按钮,弹出alert对话框
driver.find_element_by_id('alert').click()
time.sleep(1)
# 获取alert对话框
dig_alert = driver.switch_to.alert
time.sleep(1)
# 打印警告对话框内容
print(dig_alert.text)
# alert对话框属于警告对话框,我们这里只能接受弹窗
dig_alert.accept()
time.sleep(1)

driver.quit()
高版本Selenium不再支持PhantomJS浏览器了,出现下面报错, 3.141.0的还支持
Traceback (most recent call last): File "/home/yys/mobile/dg_gs.py", line 178, in <module> main() File "/home/yys/mobile/dg_gs.py", line 170, in main run = GS() File "/home/yys/mobile/dg_gs.py", line 99, in __init__ self.driver = webdriver.PhantomJS(executable_path='/usr/local/bin/phantomjs', service_args=['--ignore-ssl-errors=true', '--ssl-protocol=TLSv1']) AttributeError: module 'selenium.webdriver' has no attribute 'PhantomJS'
直接一条命令安装(实测乌版图20.04)
sudo apt install phantomjs
查看是否装上
phantomjs -v
2.1.1
注意设置cookie与Chrome有区别,要完整,path不能忽略
from selenium import webdriver
import time
import re
import random


# 调用环境变量指定的PhantomJS浏览器创建浏览器对象
class Wps(object):
    def __init__(self):
        self.device_path = 'phantomjs'
        self.driver = webdriver.PhantomJS(executable_path=self.device_path)
        # 如果没有在环境变量指定PhantomJS位置# driver = webdriver.PhantomJS(executable_path="./phantomjs"))
        # get方法会一直等到页面被完全加载,然后才会继续程序,通常测试会在这里选择 time.sleep(2)
        # driver.get("https://zt.wps.cn/spa/2019/vip_mobile_sign_v2/#/")
        self.driver.add_cookie({'name': 'name', 'value': 'value', 'path': "/", 'domain': '.wps.cn'})
        self.driver.get("https://zt.wps.cn/spa/2019/vip_mobile_sign_v2/#/")
        # 获取页面名为 wrapper的id标签的文本内容
        print(self.driver.page_source)

    def end_script(self):
        self.driver.quit()

    def ready_signal(self):
        print("准备签到")
        # print(self.driver.page_source)
        print(self.driver.get_cookies())
        for i in range(50):
            time.sleep(random.randint(1, 10) / 5)
            try:
                html = self.driver.page_source
                word = re.compile("会员明日", re.S).findall(html)
                if word:
                    print("已经签到")
                    text = self.driver.find_element_by_xpath('//*[@id="app"]/div/div[1]/div/div[1]/div[1]/span[2]').text
                    print("总共%s积分" % text)
                    return

                verify_tips = re.compile('签到成功', re.S).findall(html)
                if verify_tips:
                    print("签到成功")
                    return
                qian = re.compile('class="sec3-btn">签到</div>', re.S).findall(html)
                if qian:
                    print("找到签到,说明没签到,准备签到")
                    click = self.driver.find_element_by_xpath('//div[@class="sec3-btn"]').text
                    print(click)
                    self.driver.find_element_by_xpath('//div[@class="sec3-btn"]').click()
                    time.sleep(random.randint(1, 10) / 5)
                    html_2 = self.driver.page_source
                    verify_tips = re.compile('class="win" style="">', re.S).findall(html_2)
                    # print(verify_tips)

                    if verify_tips:
                        print(verify_tips)
                        element = self.driver.find_element_by_xpath(
                            '//*[@id="app"]//a[@class="sign_btn__big win-btn__sure"]')
                        pic = self.driver.find_element_by_xpath('//*[@id="signVerityImg"]/img')
                        location = element.location
                        print(location)
                        x = location["x"] + 101
                        y = location["y"] + 25
                        word_x = x - 141
                        word_y = y - 116
                        for j in range(80):
                            k = random.randint(0, 4)
                            time.sleep(random.uniform(0.4, 0.6))
                            pic.click()
                            time.sleep(random.uniform(0.4, 0.6))
                            element.click()
                            html_2 = self.driver.page_source
                            verify_tips = re.compile('签到成功', re.S).findall(html_2)
                            if verify_tips:
                                print("签到成功")
                                return
                        return
                    # self.driver.refresh()
            except Exception as result:
                print(result)


def main():
    run = Wps()
    # run.login()
    run.ready_signal()
    time.sleep(3)
    run.driver.quit()


if __name__ == '__main__':
    main()
去官网下载
wget https://bitbucket.org/ariya/phantomjs/downloads/phantomjs-2.1.1-linux-x86_64.tar.bz2
yum install bzip2 # 安装bzip2
tar -jxvf phantomjs-2.1.1-linux-x86_64.tar.bz2
mv phantomjs-2.1.1-linux-x86_64 /usr/local/src/phantomjs
ln -sf /usr/local/src/phantomjs/bin/phantomjs /usr/local/bin/phantomjs
phantomjs -v # 测试版本号
安装中文字体
yum install bitmap-fonts bitmap-fonts-cjk
yum groupinstall "fonts" -y # 安装字体相关的依赖包
fc-cache # 刷新字体缓存
__author__ = 'admin'  # 作者
#  -*- coding:utf-8 -*-             # 建议所有都加编码

from selenium import webdriver  # 导入webdriver包
import time
from selenium.webdriver.common.action_chains import ActionChains
# click = "document.elementFromPoint({}, {}).click()"

driver = webdriver.Ie()  # 使用ie浏览器
driver.maximize_window()
driver.get("http://app.iqiyi.com/pc/player/index.html")

client_height = driver.execute_script("return document.body.clientHeight")
client_width = driver.execute_script("return document.body.clientWidth")
print(client_height, client_width)

print(driver.title)  # 把页面title 打印出来    当没看到整个脚本执行过程时,看到打印出这句话,就说明页面被正确打开了
time.sleep(2)
# driver.execute_script(click.format('929', '336'))
ActionChains(driver).move_by_offset(client_height * 0.48, client_width * 0.189).click().perform()
time.sleep(2)

time.sleep(100)
driver.quit()  # 退出并关闭窗口的每一个相关的驱动程序 类似的表弟为 driver.close()
# driver.close()     #关闭当前窗口
selenium提供了 switch_to.frame() 方法来切入frame, switch_to.default_content()推出frame
from selenium import webdriver
import time
chrome_driver_path = r"C:\Users\yang1234\AppData\Local\Programs\Data Grand\Data Grand Robot\chromedriver.exe"
driver = webdriver.Chrome(chrome_driver_path)
driver.maximize_window()
driver.get("http://demo.fanpusoft.com")
driver.implicitly_wait(10)
# 用户名
driver.find_element_by_id("Panel_txtUserID-inputEl").send_keys("zx")
# 密码
driver.find_element_by_id("Panel_txtPassword-inputEl").send_keys("123")
# 点击登录
driver.find_element_by_id("Panel_btnLogin").click()
# 项目管理
driver.find_element_by_id("Panel2_bodyRegion_topPanel_Panel1_20").click()
# 项目立项
driver.find_element_by_xpath('//span[contains(text(), "项目立项")]').click()
# 立项报表
time.sleep(0.5)
driver.find_element_by_xpath('//span[contains(text(), "立项报表")]').click()
# 项目查询
time.sleep(0.5)
driver.find_element_by_xpath('//a[contains(text(), "项目查询")]').click()
# 进入iframe
ifr = driver.find_element_by_xpath('//*[@id="Panel2_bodyRegion_mainTabStrip_30011639"]/div/div[1]/iframe')
driver.switch_to.frame(ifr)
time.sleep(1)
# 点击项目类型:
driver.find_element_by_id("Panel1_panelTop_k149").click()
# 点击重建:
driver.find_element_by_xpath('//li[contains(text(), "房建")]').click()
# 状态流程:
driver.find_element_by_id('Panel1_panelTop_k1620-inputEl').click()
# 点击审批通过:
driver.find_element_by_xpath('//li[contains(text(), "审批通过")]').click()
# 点击查询:
time.sleep(0.5)
driver.find_element_by_xpath('//*[@id="Panel1_panelTop_BtnSearch"]/span/span').click()

# 退出第一个frame
driver.switch_to.default_content()
chrome://version/
可以看出 chrome.exe的路径
| Google Chrome | 91.0.4472.106 (正式版本) (32 位) |
| 修订版本 | 574f7b38e4e7244c92c4675e902e8f8e3d299ea7-refs/branch-heads/4472@{#1477} |
| 操作系统 | Windows 10 OS Version 2004 (Build 19041.1110) |
| JavaScript | V8 9.1.269.36 |
| 用户代理 | Mozilla/5.0 (Windows NT 10.0; WOW64) AppleWebKit/537.36 (KHTML, like Gecko) Chrome/91.0.4472.106 Safari/537.36 |
| 命令行 | "C:\Users\yys53\AppData\Local\Google\Chrome\Application\chrome.exe" --flag-switches-begin --flag-switches-end --origin-trial-disabled-features=SecurePaymentConfirmation |
| 可执行文件路径 | C:\Users\yys53\AppData\Local\Google\Chrome\Application\chrome.exe |
| 个人资料路径 | C:\Users\yys53\AppData\Local\Google\Chrome\User Data\Default |
使用 selenium 连接到已经打开的浏览器并控制它,具体做法取决于浏览器和浏览器驱动程序的支持。在这里,以 Chrome 浏览器为例,介绍如何通过 selenium 连接到已经打开的浏览器。
前提条件
- 安装 Chrome 浏览器。
- 安装 ChromeDriver。
- 安装
selenium库:pip install selenium
步骤
-
启动 Chrome 浏览器并开启远程调试端口:
首先,启动 Chrome 浏览器,并使用--remote-debugging-port参数开启远程调试端口,例如:chrome.exe --remote-debugging-port=9222 --user-data-dir="C:\chrome_debug" -
连接到已打开的 Chrome 浏览器:
使用selenium连接到已打开的 Chrome 浏览器的调试端口。
from selenium import webdriver
from selenium.webdriver.chrome.service import Service
from selenium.webdriver.chrome.options import Options
import time

# 设置 Chrome 选项
chrome_options = Options()
chrome_options.add_experimental_option("debuggerAddress", "127.0.0.1:9222")

# ChromeDriver 的路径
chrome_driver_path = "path_to_chromedriver"

# 创建 WebDriver 实例并连接到已打开的 Chrome 浏览器
service = Service(chrome_driver_path)
driver = webdriver.Chrome(service=service, options=chrome_options)

# 现在你可以使用 driver 对象控制已经打开的浏览器
driver.get("http://www.google.com")

# 等待一段时间以查看效果
time.sleep(10)

# 关闭 WebDriver
driver.quit()
说明
chrome.exe --remote-debugging-port=9222 --user-data-dir="C:\chrome_debug"命令启动 Chrome 浏览器,并开启调试端口9222。- 在 Python 代码中,使用
Options()设置选项,并通过add_experimental_option方法指定调试地址。 - 创建
Service实例,指定chromedriver的路径。 - 创建
webdriver.Chrome实例,传入service和chrome_options参数,以连接到已打开的 Chrome 浏览器。
通过这种方式,你可以使用 selenium 连接并控制已经打开的浏览器实例,而不必每次都启动新的浏览器窗口。
如果网址 之前有登录过,这个时候默认是已登录状态,不会要求输入账号密码的,省就省在这一步。
因为第一步启动了一个开放了调试端口为8210的Chrome浏览器,这里直接使用选项debugger_address来配置,后面Selenium打开的新窗口就是直接在这个开放了调试端口的浏览器中操作了。
你可以根据 URL 或网页标题进行模糊匹配,捕获已经打开的网页。以下是一个示例,演示如何使用 pychrome 根据 URL 或网页标题模糊匹配捕获并控制已经打开的标签页。
- 使用
pychrome连接到已打开的 Chrome 浏览器并捕获网页:
import pychrome

def find_tab_by_keyword(tabs, keyword):
    """
    根据关键字在标签页的 URL 和标题中进行模糊匹配,返回匹配的标签页。
    """
    for tab in tabs:
        if keyword in tab['url'] or keyword in tab['title']:
            return tab
    return None

# 创建浏览器对象并连接到 Chrome 远程调试端口
browser = pychrome.Browser(url="http://127.0.0.1:9222")

# 获取所有打开的标签页
tabs = browser.list_tab()

# 打印所有标签页的信息
for tab in tabs:
    print(f"Tab id: {tab['id']}, title: {tab['title']}, url: {tab['url']}")

# 输入你的关键词
keyword = "example"

# 根据关键词查找匹配的标签页
matched_tab = find_tab_by_keyword(tabs, keyword)

if matched_tab:
    print(f"Found tab: id={matched_tab['id']}, title={matched_tab['title']}, url={matched_tab['url']}")
    # 创建一个 Tab 对象
    tab = browser.attach(matched_tab['id'])

    # 定义一个回调函数,当页面加载完成后执行
    def on_page_loaded(*args, **kwargs):
        print("Page loaded!")

    # 启用页面加载事件
    tab.Page.enable()
    tab.Page.loadEventFired = on_page_loaded

    # 等待页面加载完成
    tab.wait(5)

    # 执行 JavaScript 代码
    result = tab.Runtime.evaluate(expression="document.title")
    print(f"Page title: {result['result']['value']}")

    # 断开与标签页的连接
    browser.close_tab(matched_tab['id'])
else:
    print("No matching tab found.")
- 使用
pychrome.Browser对象连接到 Chrome 远程调试端口。 - 使用
list_tab()方法获取所有打开的标签页信息。 - 定义
find_tab_by_keyword函数,根据关键字在标签页的 URL 和标题中进行模糊匹配,返回匹配的标签页。 - 根据关键字查找匹配的标签页并连接。
- 使用
Page.enable()和Runtime.evaluate()方法控制和操作已经打开的网页。
通过这种方式,你可以根据 URL 或网页标题进行模糊匹配,捕获并控制已经打开的标签页,实现对特定网页的操作。
移除readonly
driver.execute_script("""document.querySelector("input[Name='endDate']").removeAttribute("readonly")""")

driver.execute_script("""document.querySelector("input[Name='startDate']").removeAttribute("readonly")""")
full_path = r"G:\edge\新建文本文档.html"
pic_path = 'G:/edge/test-canvas.png'
executable_path = r"C:\Users\yys53\OneDrive\python\chromedriver.exe"


import time
from selenium import webdriver
options = webdriver.ChromeOptions()

# options.add_argument('--headless') # Chrome最新驱动无效,可以使用firefox或phantomjs
options.add_argument('--disable-gpu')
options.add_argument('--no-sandbox')
options.add_argument('window-size=1920x1080')

try:
    driver = webdriver.Chrome(executable_path=executable_path, options=options)
    driver.maximize_window()
    driver.get(f'file:///{full_path}')
    driver.get_screenshot_as_file(pic_path)
    driver.quit()
    print("截图成功")
except Exception as e:
    print("截图失败", e)
修改 C:\Windows\System32\drivers\etc\host 文件,在最后增加
127.0.0.1 update.googleapis.com
保存后 win+r 快捷键,输入cmd打开命令行,输入"ipconfig /flushdns" 刷新dns
重启浏览器即可

如果不能保存,提供以下两种方法
方法一:(给文件管理员权限)
需要管理员权限,
把host复制其他文件夹,增加127.0.0.1 update.googleapis.com后,再覆盖原来host文件即可
127.0.0.1 update.googleapis.com
修改后检查更新的效果
from selenium import webdriver
from lxml import etree
from datetime import datetime
import os

def save_webpage_source(name, driver, iframe_xpath=None):
    try:
        # 获取当前时间,拼接文件名
        now = datetime.now()
        path = r"D:\gethtml"
        if not os.path.exists(path):
            os.makedirs(path)
        this_time = name + "%s年%02d月%02d日%02d时%02d分%02d秒" % (now.year, now.month, now.day, now.hour, now.minute, now.second)
        filename = this_time + '.txt'

        # 如果有 iframe_xpath,切换到 iframe
        if iframe_xpath:
            iframe_element = driver.find_element_by_xpath(iframe_xpath)
            driver.switch_to.frame(iframe_element)

        # 获取网页源码
        html = driver.page_source

        # 拼接文本内容
        text = '# -*- coding:utf-8 -*-\nhtml="""%s"""\n' % html
        text += 'from lxml import etree\nhtmlElement = etree.HTML(html)\n'
        text += 'result = htmlElement.xpath("//div")\nprint(result) # 获取文本\n'
        text += 'if result:\n\tprint(result[0].text)'

        # 创建文件并写入内容
        with open(os.path.join(path, filename), 'w', encoding='utf-8') as file:
            file.write(text)

        print(f"文件已成功保存到: {os.path.join(path, filename)}")

    except Exception as e:
        print(f"发生错误: {str(e)}")

# 示例:使用Selenium获取网页源码
driver = webdriver.Chrome()
driver.get('https://example.com')

# 调用函数保存源码(不含iframe)
save_webpage_source("example", driver)

# 如果有iframe,需要传递iframe的xpath
iframe_xpath = "//iframe[@id='iframeID']"  # 替换为实际的iframe XPath
save_webpage_source("example_iframe", driver, iframe_xpath=iframe_xpath)

driver.quit()
html = """
<table class="tablelist" cellpadding="0" cellspacing="0">
<tbody>
<tr class="h">
<td class="l" width="374">职位名称</td>
<td>职位类别</td>
<td>人数</td>
<td>地点</td>
<td>发布时间</td>
</tr>
<tr class="even">
<td class="l square"><a target="_blank" href="position_detail.php?id=33824&keywords=python&tid=87&lid=2218">22989-金融云区块链高级研发工程师(深圳)</a></td>
<td>技术类</td>
<td>1</td>
<td>深圳</td>
<td>2017-11-25</td>
</tr>
"""
from lxml import etree
htmlElement = etree.HTML(html)
result = htmlElement.xpath("//td[text()='人数']")
print(result)
# 获取文本
if result:
print(result[0].text)
安装
Playwrigth 会安装 Chromium, Firefox and WebKit 浏览器并配置一些驱动,我们不必关心中间配置的过程,Playwright 会为我们配置好。
pip install playwright
# 安装完后初始化
playwright install
from playwright.sync_api import Playwright, sync_playwright
import time
def run(playwright: Playwright) -> None:
    browser = playwright.chromium.launch(headless=False)
    iphone_6 = playwright.devices['iPhone 6']
    context = browser.new_context(**iphone_6)
    page = context.new_page()
    page.goto("https://m.jd.com/")
    print(1)
    # 获取cookie
    # cookies = page.context.cookies()
    # print(cookies)

    # page.fill("input[name='q']", "playwright")
    # page.click("input[type='submit']")
    # page.wait_for_selector("text=Results")
    page.click("//a[@id='mCommonMy']//img")
    time.sleep(10)

with sync_playwright() as playwright:
    run(playwright)
本文作者: 永生
本文链接: https://yys.zone/detail/?id=155
版权声明: 本博客所有文章除特别声明外,均采用 CC BY-NC-SA 4.0 许可协议。转载请注明出处!
评论列表 (0 条评论)